Why Calibrate Test Equipment
By Richard Hurst, Associate Editor
By Richard Hurst, Associate Editor


Calibrate test equipment to ensure accuracy, traceability, and compliance in electrical labs using ISO 17025 procedures, NIST standards, and metrology best practices for multimeters, oscilloscopes, power analyzers, and signal generators.
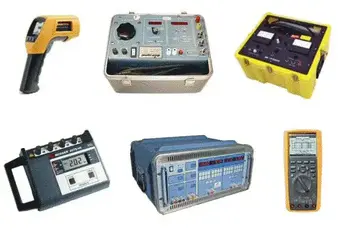
You’re serious about your electrical test instruments. You buy top brands, and you expect them to be accurate. You know some people send their digital instruments to a metrology lab for calibration, and you wonder why. After all, these are all electronic — there’s no meter movement to go out of balance. What do those calibration folks do, anyhow — just change the battery? These are valid concerns, especially since you can’t use your instrument while it’s out for calibration. But, let’s consider some other valid concerns. For example, what if an event rendered your instrument less accurate, or maybe even unsafe? What if you are working with tight tolerances, and accurate measurement is key to proper operation of expensive processes or safety systems? What if you are trending data for maintenance purposes, and two meters used for the same measurement significantly disagree? While digital meters avoid mechanical drift, understanding the behavior and limitations of legacy analog multimeters can clarify why calibration still matters in mixed toolkits today.
WHAT IS CALIBRATION?
Many people do a field comparison check of two meters, and call them “calibrated” if they give the same reading. This isn’t calibration. It’s simply a field check. It can show you if there’s a problem, but it can’t show you which meter is right. If both meters are out of calibration by the same amount and in the same direction, it won’t show you anything. Nor will it show you any trending — you won’t know your instrument is headed for an “out of cal” condition. For readers new to instrument types, a concise overview of what a multimeter is provides context for why comparison checks alone cannot verify accuracy.
Download our FREE Electrical Training Catalog and explore a full range of expert-led electrical training courses.

For an effective calibration, the calibration standard must be more accurate than the instrument under test. Most of us have a microwave oven or other appliance that displays the time in hours and minutes. Most of us live in places where we change the clocks at least twice a year, plus again after a power outage. When you set the time on that appliance, what do you use as your reference timepiece? Do you use a clock that displays seconds? You probably set the time on the “digitschallenged” appliance when the reference clock is at the “top” of a minute (e.g., zero seconds). A metrology lab follows the same philosophy. They see how closely your “whole minutes” track the correct number of seconds. And they do this at multiple points on the measurement scales. Applying disciplined reference techniques goes hand in hand with knowing how to use a digital multimeter correctly during setup and verification steps.
Calibration typically requires a standard that has at least 10 times the accuracy of the instrument under test. Otherwise, you are calibrating within overlapping tolerances and the tolerances of your standard render an “in cal” instrument “out of cal” or vice-versa. Let’s look at how that works.
Two instruments, A and B, measure 100V within 1%. At 480V, both are within tolerance. At 100V input, A reads 99.1V and B reads 100.9V. But if you use B as your standard, A will appear to be out of tolerance. However, if B is accurate to 0.1%, then the most B will read at 100V is 100.1V. Now if you compare A to B, A is in tolerance. You can also see that A is at the low end of the tolerance range. Modifying A to bring that reading up will presumably keep A from giving a false reading as it experiences normal drift between calibrations. These examples hinge on basic voltage measurement concepts that a dedicated voltmeter embodies, reinforcing the need for clear specifications and traceability.
Calibration, in its purest sense, is the comparison of an instrument to a known standard. Proper calibration involves use of a NIST-traceable standard — one that has paperwork showing it compares correctly to a chain of standards going back to a master standard maintained by the National Institute of Standards and Technology. In many facilities, calibration is one pillar of broader electrical testing programs that support compliance, uptime, and safety objectives.
In practice, calibration includes correction. Usually when you send an instrument for calibration, you authorize repair to bring the instrument back into calibration if it was “out of cal”. You’ll get a report showing how far out of calibration the instrument was before, and how far out it is after. In the minutes and seconds scenario, you’d find the calibration error required a correction to keep the device “dead on”, but the error was well within the tolerances required for the measurements you made since the last calibration.
If the report shows gross calibration errors, you may need to go back to the work you did with that instrument and take new measurements until no errors are evident. You would start with the latest measurements and work your way toward the earliest ones. In nuclear safety-related work, you would have to redo all the measurements made since the previous calibration.
After any widespread discrepancy, it may also be prudent to confirm grounding system integrity with a purpose-built ground tester to rule out site issues that could affect measurements.
CAUSES OF CALIBRATION PROBLEMS
What knocks a digital instrument “out of cal”? First, the major components of test instruments (e.g., voltage references, input dividers, current shunts) can simply shift over time. This shifting is minor and usually harmless if you keep a good calibration schedule, and this shifting is typically what calibration finds and corrects.
Stay informed with our FREE HV Testing & Maintenance Newsletter — get the latest news, breakthrough technologies, and expert insights, delivered straight to your inbox.
But, suppose you drop a current clamp — hard. How do you know that clamp will accurately measure, now? You don’t. It may well have gross calibration errors. Similarly, exposing a DMM to an overload can throw it off. Some people think this has little effect, because the inputs are fused or breaker-protected. But, those protection devices may not trip on a transient. Also, a large enough voltage input can jump across the input protection device entirely. This is far less likely with higher quality DMMs, which is one reason they are more cost-effective than the less expensive imports. Following such events, performing insulation-resistance checks with a suitable megohmmeter can reveal latent damage before the next calibration cycle.
CALIBRATION FREQUENCY
The question isn’t whether to calibrate — we can see that’s a given. The question is when to calibrate. There is no “one size fits all” answer. Consider these calibration frequencies:
From: Electrical Maintentance Handbook, Vol 10, The Electricity Forum
Explore 50+ live, expert-led electrical training courses –
